Create a New Project
In this chapter you will learn how to properly set up a project for developing a verification plug-in that works on the native file format.
Create the Project
After launching Microsoft Visual Studio 2022 choose to create a new Trados Studio Plug-in Project, and give it an appropriate name, e.g. Sdl.Sdk.FileTypeSupport.Samples.XMLChecker. The instructions for creating a Trados Studio Plug-in Project are described in the Building a Plug-in article under the Getting Started section.
Trados Studio Plug-in Project produces a Plug-in Package (.sdlplugin). This needs to be manually deployed or copied to the Trados Studio Plug-in Packages directory so that Trados Studio can use the plug-in. See the Plug-in Deployment article under the Getting Started section.
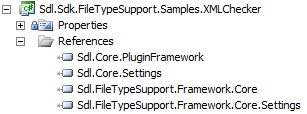
Add the Required References
Next add the references from the File Type Support Framework APIs. These are contained in the following assemblies:
- Sdl.FileTypeSupport.Framework.Core.dll: This is the main reference to the File Type Support Framework API
- Sdl.FileTypeSupport.Framework.Core.Settings.dll
Then add the references from the Core APIs.
- Sdl.Core.Settings.dll
- Sdl.Core.PluginFramework.dll
By default you find these files in the Trados Studio installation folder, usually C:\Program Files (x86)\Trados\Trados Studio\Studio17. The Copy Local property for these references should be set to True.
Note
This content may be out-of-date. To check the latest information on this topic, inspect the libraries using the Visual Studio Object Browser.